
A kamado grill delivers wood-fired heat perfect for homemade pizza. Pair it with a pizza stone and ceramic heat deflector for best results. These two accessories work together, but they serve different jobs.
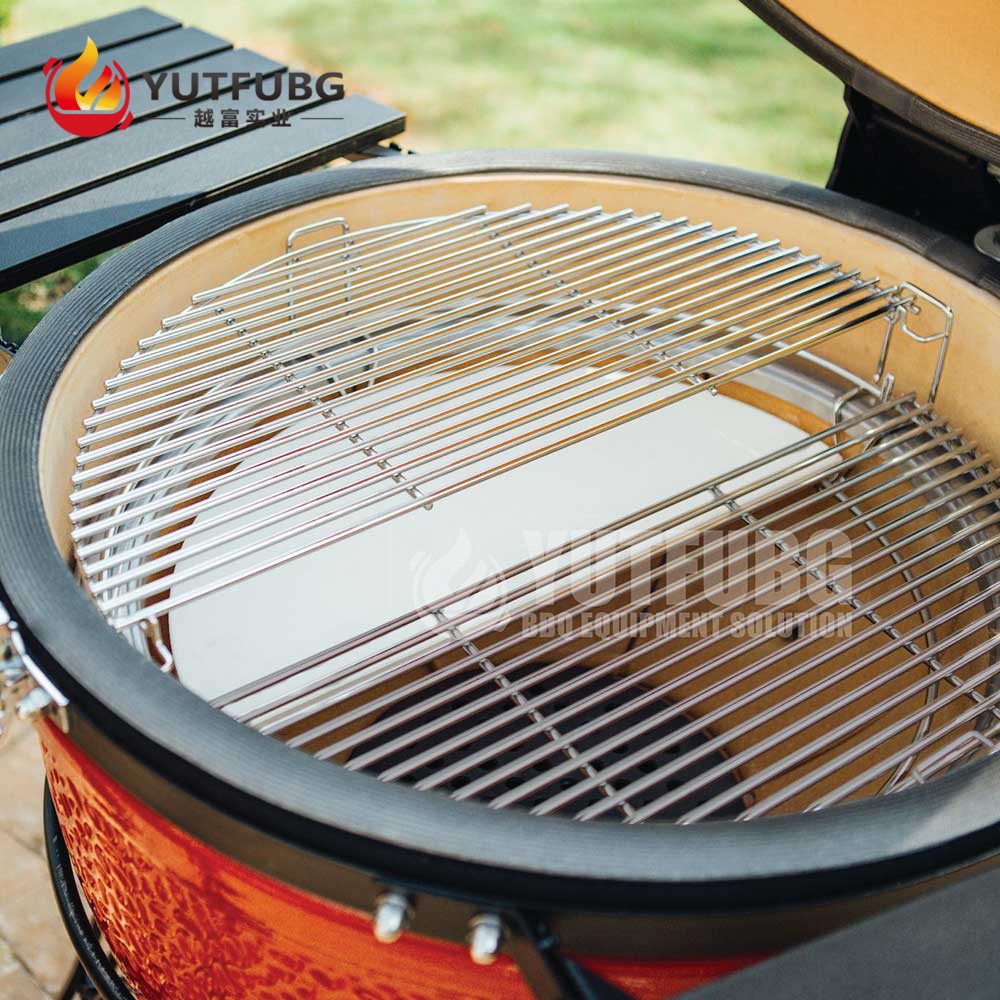
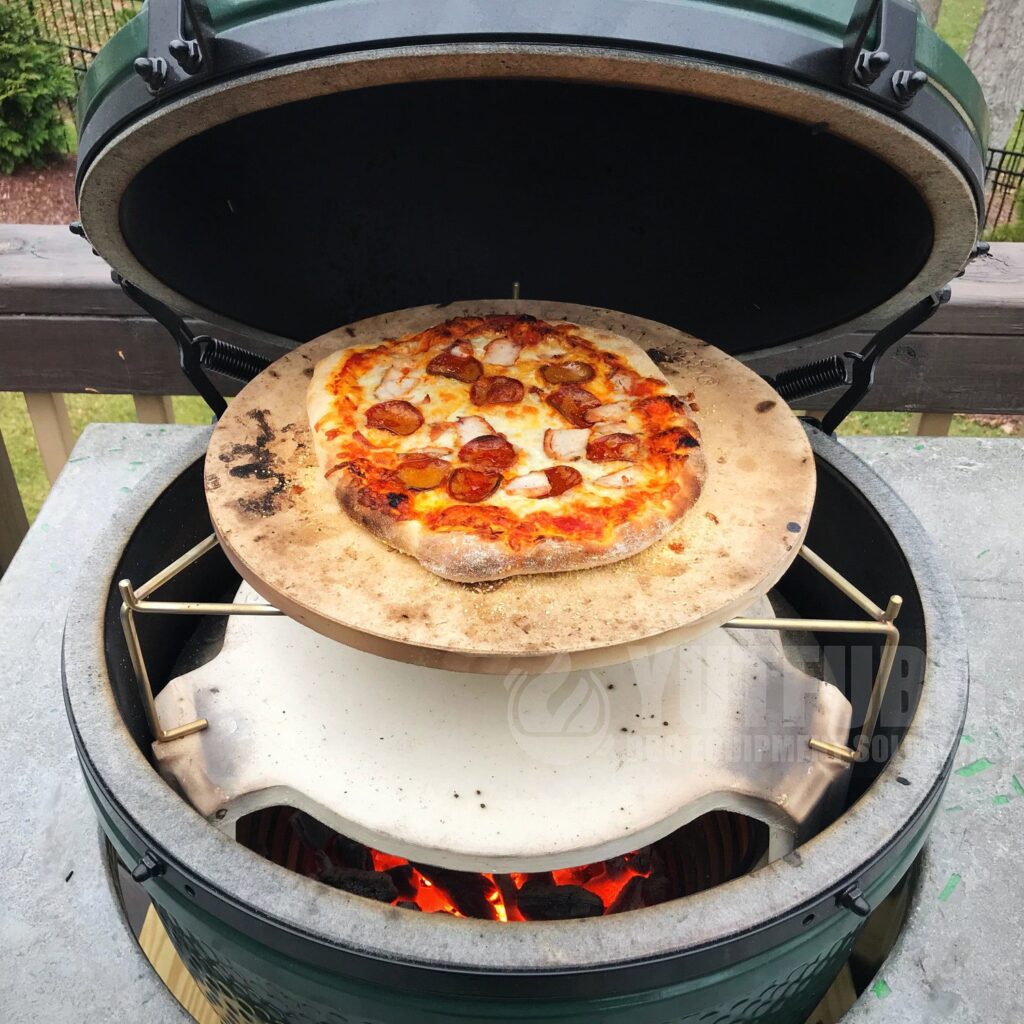
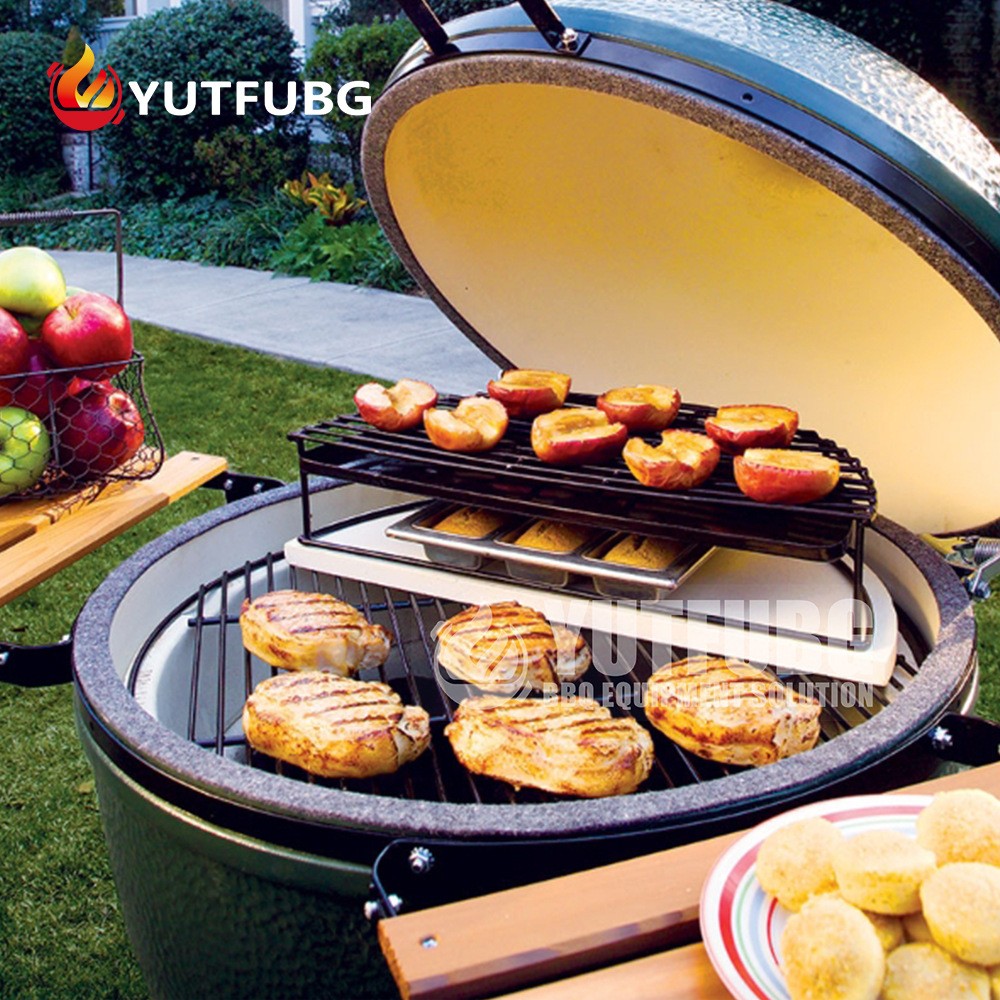
The ceramic deflector, also called a heat plate, shields food from direct flame. It turns your kamado into an indirect cooking oven. Without it, pizza bottoms burn before the cheese melts fully. The pizza stone absorbs and holds steady, even radiant heat. It gives pizza that crispy, blistered crust you love from pizzerias.
Step 1: Choose the right setup for your cook
You have two common kamado setups for pizza. One uses the heat deflector + pizza stone stacked system. The other skips the deflector for fast, high-heat Neapolitan pies. For most home bakers, the dual-piece setup is safer and more forgiving.
Step 2: Preheat your kamado and accessories slowly
Never put a cold pizza stone into a screaming hot grill. Sudden temperature shocks can crack ceramic and stone easily. Place the ceramic deflector on the lower grill grate first. Set your pizza stone on the upper rack above the deflector. Close the kamado lid and light your charcoal. Ramp the temperature up gradually over 30 to 45 minutes. Target 450–550°F for standard pizza, 650°F+ for Neapolitan style. Slow preheating lets both ceramic pieces expand evenly.
Step 3: Adjust vents to hold consistent oven heat
Kamado grills rely on top and bottom vent control. Open the bottom vent a small amount for steady airflow. Crack the top vent just enough to lock in your target temp. Avoid wide-open vents once you hit your cooking temperature. Big heat spikes will ruin your stone-cooked pizza crust. Check the internal temp with a kamado thermometer, not guesswork.
Step 4: Prep and launch your pizza correctly
Dust your pizza peel lightly with cornmeal or semolina flour. This stops dough from sticking when you slide it onto the stone. Keep pizza toppings light; wet toppings make a soggy crust. Open the kamado lid fully once the stone is ready. Slide the pizza gently off the peel onto the hot stone surface. Close the lid right away to trap that valuable oven heat inside.
Step 5: Cook and rotate for even browning
Most pies take 6–12 minutes, depending on your grill temperature. Rotate the pizza halfway through the cook time. Kamados often have hot spots, so rotation balances baking. Watch closely once the crust starts to bubble and brown. Pull it out as soon as the cheese is golden and bubbly.
Step 6: Cool down and clean your pizza stone & deflector
Do not spray cold water on hot ceramic accessories. Let everything cool completely inside the closed kamado. This cooling process takes at least one full hour. Brush off baked-on flour and crumbs with a stiff dry brush. Skip soap; soap soaks into porous stone and ruins future bakes. Wipe stubborn spots with a tiny bit of warm water only. Store the stone and deflector somewhere dry, away from rapid temp shifts.
Common mistakes to avoid
Skipping the heat deflector leads to burnt pizza bottoms. Rushing preheat is the #1 cause of cracked pizza stones. Overloading pizza with sauce creates a wet, floppy crust. Opening the kamado lid too often crashes your grill temperature. Moving a hot stone or deflector with bare hands causes burns.
Final thoughts
A pizza stone plus ceramic deflector unlocks your kamado’s pizza potential. Slow heating, indirect heat, and careful vent control are your keys. With practice, you can make restaurant-quality pizza at home every time.